Hi folks! Thank you so much for following me for the duration of ADNAS, but I have decided to start anew at- The Full-time Foodie . Hoping to keep the new one updated more consistently and hope you'll continue to support the new blog :)I'm back and I have relocated!!
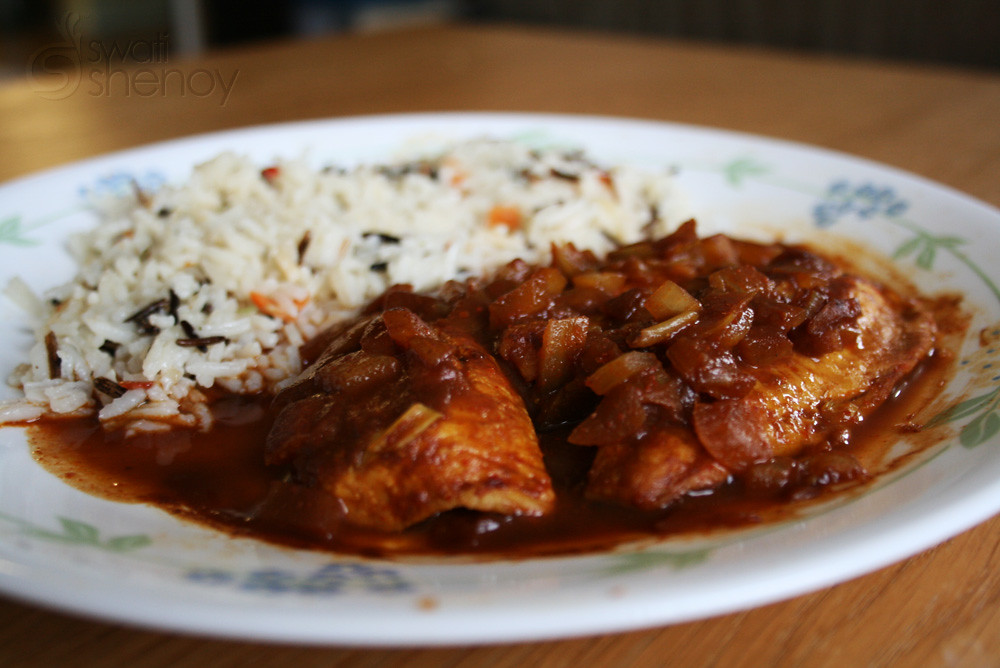
Hi folks! Thank you so much for following me for the duration of ADNAS, but I have decided to start anew at- The Full-time Foodie . Hoping to keep the new one updated more consistently and hope you'll continue to support the new blog :)Rosemary Mustard Pork Chops
One of the hardest things for me is planning my dinners. I sometimes do plan ahead, but that's pretty tough to do when spontaneity is still part of your "routine" :) I mostly look up recipes the day of and go shopping right before dinner, which works out great except that I'm a flavor junkie, so marinating is almost always necessary when I'm making meat dishes (specifically thick cuts of meat like pork). But then there are times I come across a recipe that blows my tastebuds away, like the one I tried yesterday. Hope you enjoy this as much as I do if you decide to give it a shot!
Rosemary Mustard Pork Chops
Adapted from a recipe by Zesty Cook
Prep Time: 6-7 Minutes | Cooking Time: 10 minutes + 12 minutes baking time
Serves: 2
Ingredients:
- 2 Pork Chops
- 1 Tbsp Dijon Mustard
- 1 Tbsp Soy Sauce
- 1/4 Cup Chicken Stock
- 2 tsp Brown Sugar
- 1 tsp Paprika
- 1 Tbsp Rosemary, dried
- 1 tsp Black Pepper
- 1 tsp Salt
Directions:
- Preheat oven to 350° and grease an 8x8 baking dish.
- In a small bowl whisk together- soy sauce, mustard, paprika, brown sugar and rosemary and set aside.
- Pat dry the pork chops with a paper towel and season with salt & pepper on each side.
- Heat a skillet on medium high heat for 1 minute.
- Add the pork chops to the pan and sear for 3-4 minutes on each side.
- Remove pork chops (leave the skillet on medium high heat) and place on top of the baking dish.
- Add the chicken stock and simmer for about 1 minute.
- Add the sauce mixture from step 2 and let thicken for 2 minutes.
- Turn the heat off and pour the sauce on top of the pork chops.
- Place the baking dish in the oven and bake for 12 minutes.
- Remove from oven, baste with sauce in the dish and serve immediately with your choice of grain.
**TIP: Serve with polenta, it takes under 10 minutes to make and goes amazingly well with the saucey pork chop!
10:39 PM
Post Was Published On
Swati
Posted in
Hummus & Zucchini Pizza
I have a lot of weird quirks when it comes to popular food items. For instance, I don't like ketchup. I'm not repulsed by it and if I HAD to eat it I would, but it's definitely not my go-to condiment. On a similar note, I know so many people who can eat pizza any ol' time… I, on the other hand, have to be in the mood for pizza and that is a pretty rare occurrence. Of course when I come across something completely out of the box, even the likes of pizza sounds amazing! Which is exactly what happened when I came across the F&W recipe for Hummus & Zucchini Pizza. I didn't even THINK hummus can be used as the sauce! (Generally my reservation with pizza has to do with the tomato sauce, not a big fan). I was a bit skeptical about how this would turn out, but this had to be the most delicious pizza I've ever had!
Here's my edited version of the F&W recipe:
Prep time: 15 minutes | Baking time: 10 minutes
Serves: 4 people comfortably
Ingredients:
- 2 Whole Wheat Pizza Crusts (if you only have dough, follow the F&W recipe above)
- 1 Package of Spicy Hummus (7 Ounce)
- 3 Medium Zucchinis, round slices (1 1/2 lbs or so)
- 1 Garlic Clove, minced
- 1/4 cup & 3 Tbsp of Extra Virgin Olive Oil
- Salt & Pepper to taste
- Preheat Oven to 400 degrees.
- In a medium bowl, mix the garlic and 3 Tbsp of olive oil together.
- Add the zucchini slices to the bowl and add salt & pepper to taste. Toss until slices are coated with oil & seasonings.
- In a large skillet on high heat, add the zucchini & minced garlic and cook until the zucchini slices are golden brown (about 3 minutes on each side of the slices). Do this in batches to ensure all the slices get somewhat browned.
- In a small bowl add the 1/4 cup of oil & mix in the hummus well together.
- Take about a 1/4 cup of the hummus mixture and spread on top of the pizza crust with a spatula (1/4 cup of the hummus mixture per pizza crust)
- Place the zucchini slices & cooked garlic bits on top of the pizza crust
- Place one pizza crust directly on top of the wire racks in the oven for 10 minutes (check frequently to make sure the crust is cooking well and that it's not under/over done). Remove from oven when the pizza has sufficiently baked.
- Repeat with the second pizza crust.
- Apply remaining hummus mixture on top of the pizzas.
- Serve immediately!
11:08 PM
Post Was Published On
Swati
Posted in
Masala Chicken Drumsticks
Suril: "You should add a blurb for your posts, those are more fun to read".
I can always count on him to tell me what's up :) So as you can see I have been better about updating my blog these days! Wooo! Life has calmed down a bit after my brief San Francisco stint- which by the way, if you're a foodie and haven't been.... book a trip to SF straight away! I have never had so many consecutive delicious dinner and lunch outings as I did there. Maybe it's just that we did a lot of research and had great recommendations from friends who live out there, but I really think SF tops my list in best cities for foodies. It was a nice break from cooking, but it definitely inspired me to cook more once I got back to DC :)
I've also had a sudden surge of interest in cooking Indian food. I was hoping to restart my blog with a biryani recipe, but I'm still in the midst of perfecting my recipe and will share once I've reached a satisfactory point of.... perfection! Instead I decided to create a sort of Tandoori Chicken recipe... sans the tandoor masala (which I didn't have unfortunately). This is just as delish though and definitely worth trying if you're in the mood to try something different with chicken drumsticks!
I can always count on him to tell me what's up :) So as you can see I have been better about updating my blog these days! Wooo! Life has calmed down a bit after my brief San Francisco stint- which by the way, if you're a foodie and haven't been.... book a trip to SF straight away! I have never had so many consecutive delicious dinner and lunch outings as I did there. Maybe it's just that we did a lot of research and had great recommendations from friends who live out there, but I really think SF tops my list in best cities for foodies. It was a nice break from cooking, but it definitely inspired me to cook more once I got back to DC :)
I've also had a sudden surge of interest in cooking Indian food. I was hoping to restart my blog with a biryani recipe, but I'm still in the midst of perfecting my recipe and will share once I've reached a satisfactory point of.... perfection! Instead I decided to create a sort of Tandoori Chicken recipe... sans the tandoor masala (which I didn't have unfortunately). This is just as delish though and definitely worth trying if you're in the mood to try something different with chicken drumsticks!
Masala Chicken Drumsticks
Prep time: 10 minutes (minus the marinating time) | Baking time: 40 minutes + 4 minutes broiling
Ingredients:
- 6-8 Skinless Chicken Drumsticks
- 1/2 Cup Yogurt
- 1 Tbsp Ginger Garlic Paste
- 2 Tbsp Garam Masala or Kitchen King Masala
- 1/4 Cup Chopped Mint
- 1 tsp Chili Powder
- 1 tbsp Paprika
- Salt to taste
- 1 tsp Oil
Directions:
- In a large bowl, mix the yogurt, ginger garlic paste, masala, mint, paprika and chili powder well together.
- Add as much salt as you like and mix in the yogurt mixture, I added about 3 teaspoons.
- Cut small slits into the chicken drumsticks (it helps the chicken soak in more of the marinade)
- Add the drumsticks to the bowl of the yogurt marinade and mix really well until all sides of the chicken are coated with the yogurt and basically submerged into the marinade.
- Store the bowl covered with saran wrap in the fridge overnight.
- Preheat oven to 400 degrees.
- Place the chicken drumsticks spread out on a greased 13 x 9 inch pan
- Bake the drumsticks for 40 minutes, turning them over half way through. Ensure that the chicken is cooked through and juices run clear.
- If they are not golden brown after 40 minutes, turn the oven setting to Broil and broil the chicken for about 2-4 minutes (please keep checking on the chicken every minute to make sure they don't burn).
- Serve hot!
4:37 PM
Post Was Published On
Swati
Posted in
Mixed Berry Muffins with Lemon Icing
Prep Time: 15 minutes | Baking Time: 20 minutes
Ingredients:
- 2 cups whole wheat flour
- 1/2 cup sugar
- 1 teaspoon baking powder
- 1/2 teaspoon baking soda
- 1/2 teaspoon salt
- 1/8 teaspoon ground cinnamon
- 1/4 cup butter
- 1 1/4 cups low-fat buttermilk (Substitute: 1 1/4 cups of milk + 1 tbsp of lemon juice mix, let stand at room temperature for 5 minutes)
- 1 large egg
- 1 tablespoon grated lemon zest
- 1 cup frozen mixed berries, no thawing necessary (any one kind of berry is ok too!)
- Cooking spray
- 1 tablespoon fresh lemon juice
- 1/2 cup powdered sugar
Directions:
- Preheat oven to 400°.
- Combine flour and next 5 ingredients (flour through cinnamon) in a medium bowl; cut in small pieces of butter and mix well until mixture resembles coarse meal.
- Combine buttermilk/substitute, egg, and zest; stir well with a whisk.
- Add to flour mixture; stir just until moist.
- Gently fold in mixed berries.
- Spoon batter into 12 muffin cups coated with cooking spray. Bake at 400° for 20 minutes or until the muffins spring back when lightly touched.
- Remove muffins from pans immediately, and place on a wire rack to cool.
- After muffins have cooled, combine lemon juice and powdered sugar in a small bowl. Drizzle glaze evenly over cooled muffins.
5:16 PM
Post Was Published On
Swati
Posted in
Chicken Matzo Ball Soup
Prep time: 20-30 minutes total | Cooking time: 1 Hour & 5 Minutes
Adapted from a recipe (with my own variations) in Martha Stewart Online
Ingredients:
- 1 teaspoon plus 2 tablespoons vegetable oil
- 1/2 cup onion, minced
- 1 small onion, diced into 1/2 inch pieces
- 2 large eggs, lightly beaten
- Kosher salt & pepper
- 1/2 cup plus 2 tablespoons matzo meal
- 2 tablespoons seltzer water
- 4 chicken thighs (between 1 & 1.5 lbs weight for whole package of thighs)
- 1 celery stalk, chopped into 1/2 inch pieces
- 1 carrot, chopped into 1/2 inch pieces
- 4 cups of chicken broth
- 4 cups of water
Directions:
- In a small nonstick skillet, heat 1 teaspoon oil over medium heat. Add minced onion, and cook until tender, about 5 minutes; let cool.
- In a medium bowl, combine remaining 2 tablespoons oil, eggs, 1 teaspoon salt, and matzo meal.
- Add seltzer and cooled onion; stir to combine. Cover and refrigerate at least 15 minutes.
- Meanwhile, in a large pot, combine chicken, celery, carrot, and diced onion. Add broth and 4 cups water. Bring to a boil; reduce to a simmer, and cook 30 minutes.
- Remove chicken from broth; shred meat, and discard bones.
- With oiled hands, shape matzo mixture into 8 balls, about 1 1/2 inches in diameter.
- Return broth to a boil; reduce to a simmer.
- Add matzo balls; cover, and cook until expanded, 30 minutes.
- Stir in shredded chicken. Season with salt and pepper. Serve immediately.
12:28 PM
Post Was Published On
Swati
Posted in
Salmon Pasta with Mint-Cilantro Pesto
- 1/2 lb Whole Wheat Fusilli Pasta
- 1 (6-8 Oz) Salmon Fillet (thawed if frozen)
- 1/2 tsp Salt
- 1/2 tsp Pepper
- 1 tbsp Vegetable Oil
- 1/8 Cup Shredded Parmesan (optional)
- 1/8 Cup Chopped Walnuts (optional)
- Pesto Ingredients:
- 1 Bunch Cilantro, chopped
- 1 Bunch Mint, chopped
- 1 Garlic Clove, chopped
- 1 1/4 tsp Salt
- 2-3 Tbsp Lemon Juice
- 1/4 Cup Grated Parmesan
- 1 tsp Olive Oil
Directions:
- Add all the pesto ingredients in a blender and puree (adjust salt & lemon juice according to your preference)
- Season the Salmon fillet with salt & pepper.
- Heat the vegetable oil in a skillet on medium-heat for 45 seconds & add the fillet to the pan.
- Cover and cook the fillet for 2 to 3 minutes on each side, or until the Salmon has cooked through and flakes easily and set aside.
- Bring a large pot of salted water to boil
- Add fusilli pasta & cook al dente for 12 minutes and drain.
- Cut the fillet into bite size pieces (the fish will flake, don't worry if the pieces are not perfect)
- Add the Salmon pieces & about 3/4 cup of the pesto to the pasta and mix well.
- Garnish with shredded Parmesan & Walnuts (optional)
**TIP: Add more pesto if you like your pasta saucy and store/freeze the rest for later use!
1:12 PM
Post Was Published On
Swati
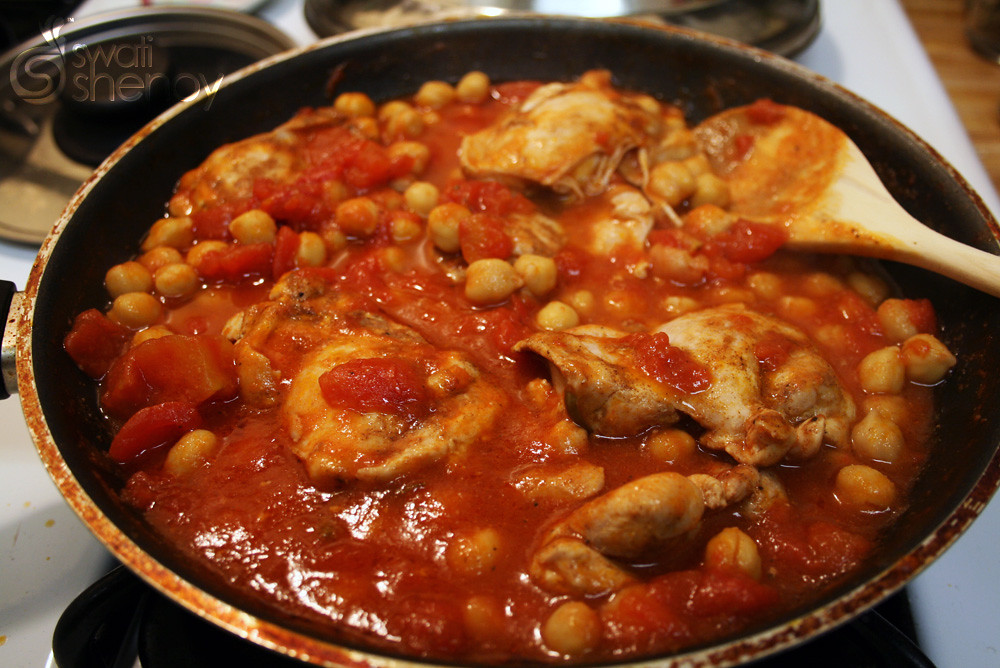
Lemon Scented Muffins, Stuffed Mushrooms & Chicken Tagine!
Lemon-Scented Muffins
Adapted from a recipe by Cooking Light
Prep time: 10 minutes | Baking time: 25 minutes
Ingredients:
- 1 cup all-purpose flour
- 1/2 cup granulated sugar
- 1 teaspoon baking powder
- 1/4 teaspoon salt
- 1/2 cup fat-free strained yogurt
- 1 1/2 tablespoons grated lemon rind
- 2 tablespoons extravirgin olive oil
- 1 1/2 tablespoons fat-free milk
- 2 teaspoons fresh lemon juice
- 1 large egg
- 1 large egg white
- Cooking spray
- Preheat oven to 350°.
- To prepare muffins, lightly spoon flour into a dry measuring cup; level with a knife. Combine flour, sugar, baking powder, and salt in a large bowl; stir well with a whisk. Make a well in center of mixture.
- Combine yogurt and next 6 ingredients (through egg white) in a small bowl; stir with a whisk until well combined. Add to flour mixture, stirring just until moist.
- Spoon batter evenly into 10 muffin cups coated with cooking spray. Bake at 350° for 25 minutes or until muffins spring back when touched lightly in center. Remove from pans immediately. Cool completely on a wire rack.
Stuffed Mushrooms
Adapted from a recipe by Simply Recipes
Prep time: 20 minutes | Baking time: 12-15 minutes
- 10 baby bella mushrooms, scrubbed with stems separated from caps
- 1 Tbsp butter
- 1/8 cup diced red onion
- 1 large garlic clove, minced
- Salt
- 2 Tbsp chopped parsley
- 1/4 tsp oregano
- 1/4 tsp basil
- 2 Tbsp breadcrumbs
- 2 Tbsp chicken stock
- 2 Tbsp olive oil
- 2 Tbsp shredded/grated parmesan cheese
- Preheat oven to 375°F.
- Finely chop the mushroom stems.
- Heat 1 tablespoon butter in a small frying pan over medium-high heat and sauté the chopped mushroom stems and the shallots for 4-5 minutes, stirring often.
- Add the garlic and sprinkle with salt. Stir well and sauté 2 more minutes.
- Turn off the heat and add the parsley, herbes de Provence and breadcrumbs.
- Pour the chicken stock into a food processor, then the rest of the stuffing.
- Pulse several times to get a fine mixture, almost a paste.
- Toss the mushroom caps with olive oil. Fill each mushroom with the stuffing.
- Sprinkle parmesan cheese over each mushroom and bake for 12-15 minutes, or until the cheese browns a little.
- Allow to cool for 5 minutes or so before serving.
Chicken Tagine
Adapted from a recipe by Cooking Light
Prep time: 5 minutes | Cooking time: 15 minutes
Ingredients:
- 8 (3-ounce) skinless, boneless chicken thighs
- 1 1/2 teaspoons salt-free Moroccan spice blend (such as The Spice Hunter)
- 1/4 teaspoon salt
- 1/4 teaspoon black pepper
- 2 teaspoons olive oil
- 1 (16-ounce) can chickpeas (garbanzo beans), rinsed and drained
- 1 (14.5-ounce) can diced tomatoes with garlic and onion, undrained
- 3/4 cup uncooked quinoa
- Sprinkle both sides of chicken evenly with spice blend, salt, and pepper.
- Heat oil in a large nonstick skillet over medium-high heat; add chicken.
- Cook 2 to 3 minutes on each side or until browned.
- Add chickpeas and tomatoes; bring to a boil.
- Cover, reduce heat, and simmer 8 minutes or until chicken is done.
- While chicken simmers, cook quinoa according to package directions, omitting salt and fat.
- Serve chicken with sauce over the quinoa.
12:57 AM
Post Was Published On
Swati
Posted in
Worst Blogger Award Goes To......
Hi folks!
As you guessed, I neglected my blog once again. I don't know how people work a full-time job, cook, clean, socialize and blog! Seriously, if you fit that description- you need to share your secret with me because I always find that I either have no time or energy to come up with a creative and witty post every other week! For this reason I decided that I will update as frequently as possible and keep it bare bones with the important stuff: photo + recipe. Hopefully that will motivate me to share more frequently and will encourage you to check my blog more frequently since it would mean less of my drivel! Win win :)
So I'm going to end my drivel here and get right to the good stuff!-
Chicken Piccata
Adapted from a recipe by Cooking Light
(but we encourage you to read the part about cooking the chicken below, we followed thekitchn's advice)
Prep time: 15 minutes | Cooking time: 30 minutes
Ingredients:
As you guessed, I neglected my blog once again. I don't know how people work a full-time job, cook, clean, socialize and blog! Seriously, if you fit that description- you need to share your secret with me because I always find that I either have no time or energy to come up with a creative and witty post every other week! For this reason I decided that I will update as frequently as possible and keep it bare bones with the important stuff: photo + recipe. Hopefully that will motivate me to share more frequently and will encourage you to check my blog more frequently since it would mean less of my drivel! Win win :)
So I'm going to end my drivel here and get right to the good stuff!-
Chicken Piccata
Adapted from a recipe by Cooking Light
(but we encourage you to read the part about cooking the chicken below, we followed thekitchn's advice)
Prep time: 15 minutes | Cooking time: 30 minutes
Ingredients:
- 4 (6-ounce) skinless, boneless chicken breast halves
- 1/2 cup all-purpose flour
- 1/2 teaspoon sea salt
- 1/4 teaspoon freshly ground black pepper
- 2 1/2 tablespoons butter, divided
- 2 tablespoons olive oil, divided
- 1/4 cup finely chopped shallots
- 4 medium garlic cloves, thinly sliced
- 1/2 cup dry white wine
- 3/4 cup fat-free, lower-sodium chicken broth
- 2 tablespoons fresh lemon juice
- 1 1/2 tablespoons drained capers
- 3 tablespoons coarsely chopped fresh flat-leaf parsley
Directions:
- Place each chicken breast half between 2 sheets of heavy-duty plastic wrap; pound to 1/2-inch thickness using a meat mallet or small heavy skillet.
- Place 1 teaspoon flour in a small bowl, and place remaining flour in a shallow dish.
- Sprinkle both sides of chicken evenly with salt and pepper.
- Dredge chicken in flour in shallow dish; shake off excess.
- Melt 1 tablespoon butter in a large skillet over medium-high heat. Add 1 tablespoon oil to pan; swirl to coat.
- Turn the heat to medium and add chicken breasts to pan
- Cook for just 1 minute on one side, then turn each chicken breast over
- Turn the heat to low and put a lid on the pan.
- Leave the chicken in there for 10 minutes (do NOT open the lid to peek, the heat building up is very important to cooking the chicken thoroughly)
- After 10 minutes, turn the heat off but do NOT open the lid. Leave the chicken in the pan with the lid on for another 10 minutes. The chicken will finish cooking in the remaining heat and will be moist to perfection.
- Meanwhile, heat remaining 1 tablespoon oil in a separate pan; swirl to coat.
- Add shallots to pan; sauté 3 minutes, stirring frequently. Add garlic; sauté 1 minute, stirring constantly.
- Add wine; bring to a boil, scraping pan to loosen browned bits. Cook until liquid almost evaporates, stirring occasionally.
- Add 1/4 cup broth to reserved 1 teaspoon flour; stir until smooth.
- Add remaining 1/2 cup broth to pan; bring to a boil.
- Cook until reduced by half (about 5 minutes).
- Stir in flour mixture; cook 1 minute or until slightly thick, stirring frequently.
- Remove from heat and stir in remaining 1 1/2 tablespoons butter, juice, and capers.
- After the chicken's remaining 10 minutes have lapsed, place the chicken breasts on a serving plate (or plates if separating)
- Top each serving with about 2 tablespoons sauce. Sprinkle each serving with about 2 teaspoons parsley.
9:04 PM
Post Was Published On
Swati
Posted in
Inspired by......laziness!
Sooo I decided to take a wee break from themes this weekend and do the good ol fashion "I'm too lazy to run to the grocery store/finish things in my fridge/pantry" dance. Thankfully my fridge & pantry had some great stuff to work with! I bought a bag of brussels sprouts last week knowing that I would not muster the energy to shop for a recipe and Suril had serendipitously purchased a "Cooking Light" magazine with an amazing recipe for brussels sprouts. For the accompanying recipe- My mom, being a constant source of enlightenment in my foodie world, gave me a bag of "black rice" a few weeks ago. It looks SUPER interesting uncooked and I was so curious to see what the texture/taste of this new grain would be like. So I decided to google and surely enough, found a simple recipe using ingredients I already had. The texture, as predicted, was amazing and very similar to brown (maybe even yummier!). A little familiar with the unfamiliar resulted in a great meal!
Brussels Sprouts Gratin
Adapted from a recipe by Cooking Light
Prep time: 15 minutes | Cooking time: 20 minutes
Ingredients:
Directions:
Black Rice & Edamame
Adapted from a recipe by thekitchn
Cooking time: 40 minutes
Ingredients:
Brussels Sprouts Gratin
Adapted from a recipe by Cooking Light
Prep time: 15 minutes | Cooking time: 20 minutes
Ingredients:
- 3 bacon slices
- 1/2 medium onion, diced
- 2 pounds Brussels sprouts, trimmed and halved
- 1 cup water
- 1/2 teaspoon salt
- 1/4 teaspoon freshly ground black pepper
- Cooking spray
- 1 (2-ounce) slice French bread baguette, torn to small bits
- 3 tablespoons butter
Directions:
- Preheat broiler.
- Cook bacon in a large skillet over medium heat until crisp. Remove bacon from pan, reserving drippings; crumble in a separate bowl/plate.
- Increase heat to medium-high.
- Add diced onion to drippings in pan; sauté for 2 minutes or until tender, stirring occasionally.
- Add Brussels sprouts and 1 cup water; bring to a boil.
- Cover pan loosely with aluminum foil; cook 6 minutes or until Brussels sprouts are almost tender.
- Uncover and remove from heat.
- Sprinkle with 1/4 teaspoon salt and pepper; toss to combine.
- Spoon Brussels sprouts mixture into a 2-quart broiler-safe glass or ceramic baking dish coated with cooking spray.
- Place baguette bits in a food processor, and process until finely ground.
- Melt butter in skillet over medium-high heat.
- Add breadcrumbs and remaining 1/4 teaspoon salt to pan; sauté for 2 minutes or until toasted, stirring frequently.
- Add cooked, crumbled bacon to toasted breadcrumb mixture.
- Sprinkle the breadcrumb mixture over Brussels sprouts mixture.
- Broil 3 minutes or until golden and thoroughly heated.
Adapted from a recipe by thekitchn
Cooking time: 40 minutes
Ingredients:
- 1 cup black rice
- 1 white onion, diced
- 2 tsp vegetable oil
- 2 tsp olive oil
- 2 cup low-sodium chicken broth
- 3/4 cup frozen edamame
- 1 tsp sesame oil
- 2 tsp soy sauce
Directions:
- Heat vegetable oil over medium heat. Add onion and cook until translucent.
- Add rice and cook for 1 minute.
- Pour chicken broth over top and bring to a boil.
- Reduce heat to a simmer and cover. Cook for 30 minutes.
- 5 minutes before the timer goes off, sautee edamame in a small pan with a little olive oil.
- In a small bowl, combine sesame oil and soy sauce.
- Remove the cover from the rice and fluff.
- Pour the oil and soy sauce over top and add the edamame. Stir to incorporate and remove from heat.
12:44 AM
Post Was Published On
Swati
Posted in
Road to Morocco!
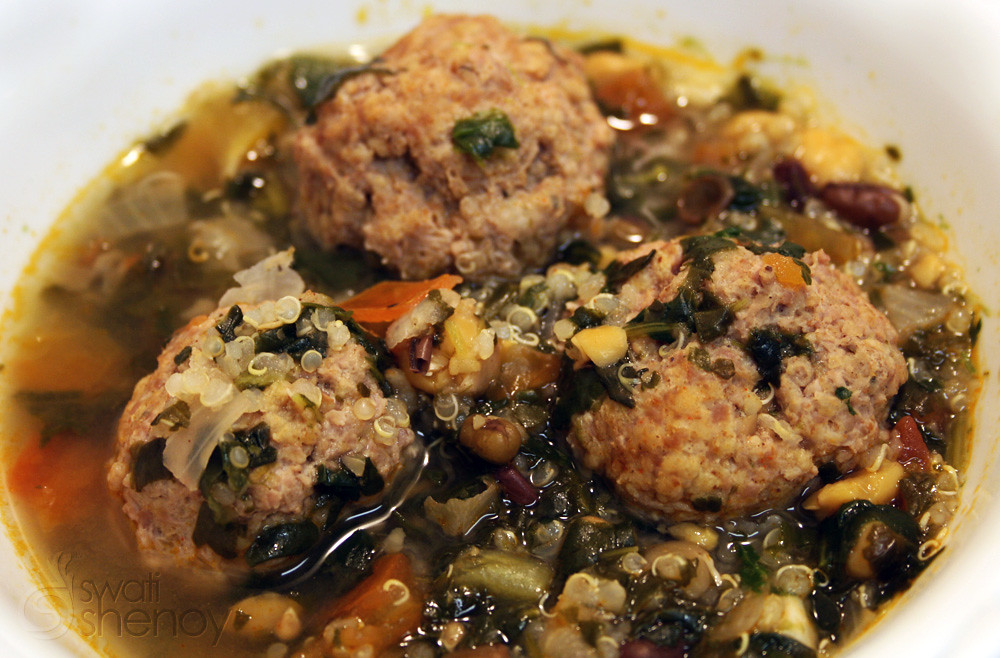
So.... it's official: I'm obsessed with ground turkey :) I feel like it's super easy/fast to cook and you can do so many different things with it. I've made delicious turkey burgers, made a minced turkey pasta dish and today I tried my hand at meatballs! Yep, I'm obsessed and I'm ok with that! So I wanted to do SOMETHING with meatballs and I kept seeing recipes for spaghetti with meatballs in marinara/tomato sauce. Don't judge me, but I'm really not a fan of marinara on spaghetti/meatballs. I think I just remember those canned/bottled sauces that are really sweet and remind me too much of ketchup. So I wanted to avoid that all together and look for a stew of sorts. I'm so glad I did because the recipe I found is phenomenal with all its amazing Moroccan spices and I urge all meatball fans to try this out! It's wholesome, hearty, comforting and HEALTHY!
Moroccan Turkey Meatball Soup
Soup Ingredients:
- 1 Tbsp olive oil
- 1 onion, diced
- 4 cloves garlic, minced
- 1 tsp cinnamon
- 1 tsp cumin
- 1 tsp cayenne pepper
- 1 tsp paprika
- 1 large tomato (or 2 medium tomatoes), diced
- 1 can chickpeas, drained and rinsed
- 9-10 cups vegetable or chicken stock (I used 10 cups of water with organic low-sodium chicken boullions)
- 1/2 tsp sugar
- salt & pepper to taste
- 1/2 cup quinoa
- 1/2 cup frozen spinach
- 1/4 cup of dried lentils/beans (I used this- http://www.truroots.com/p.aspx?Cont=Products&id=13)
Meatball Ingredients:
- 1 lb ground turkey
- 1/2 cup breadcrumbs
- 1 egg
- 1 tsp cumin
- 1 tsp salt
- 1 tsp fresh basil, chopped
- 1 tsp pepper
Directions:
- Saute onion and garlic in olive oil for about 5 minutes.
- Add cinnamon, cumin, cayenne pepper, paprika. Then add diced tomatoes and chickpeas.
- Use a potato masher to mash up some of the chickpeas.
- Then add the stock, sugar, and salt & pepper. Bring to a boil.
- While the soup is getting to a boil, make the meatballs by combining ground turkey, breadcrumbs, egg, and the spices/salt.
- Form small 1 inch meatballs and drop into the boiling soup.
- Then bring soup down to a simmer, and let simmer for about 25 minutes.
- After 25 minutes, add quinoa and spinach, and let cook for another 15 minutes.
- Ensure the meatballs and quinoa have cooked thoroughly before serving!
12:35 AM
Post Was Published On
Swati
Posted in
Opa!
Oh theme dinners, how I love thee! Seriously, what a great way to learn about the hard work that goes into cooking a dish in another culture… and let me tell ya, Greek food is HARD WORK. We had just two dishes lined up to make and it took us about 3 1/2 hours before we could eat! Now don't let that timing scare you, because the recipe I'm sharing is for the Orzo with Ground Turkey dish. It actually takes an hour and 15 minutes or so and only 30 minutes of it is prep/cooking time, while the rest involves leaving a baking dish in the oven (I love me some oven cooked meals!). It turned out to be extremely delish and I foresee repeating this meal in the future!
The dolmas were a different story however. We had no idea what we were in for and the end result wasn't really desirable since the rice wasn't cooked enough and the recipe called for WAY too much lemon juice. Normally that's a good thing in my books, but really this was too sour even for my taste buds. I'm sharing a pic of the attempt since a lot of hard work did go into it. I definitely plan on another attempt with some fixes to make these dolmas as edible as they look (Thanks to Suril's handy work with rolling the grape leaves!)-
I have a new found respect for canned grape leaves, that's for sure!
Yiouvetsi me Kimá Galopoúlas
Adapted from greekfood.about.com
Ingredients:
The dolmas were a different story however. We had no idea what we were in for and the end result wasn't really desirable since the rice wasn't cooked enough and the recipe called for WAY too much lemon juice. Normally that's a good thing in my books, but really this was too sour even for my taste buds. I'm sharing a pic of the attempt since a lot of hard work did go into it. I definitely plan on another attempt with some fixes to make these dolmas as edible as they look (Thanks to Suril's handy work with rolling the grape leaves!)-
I have a new found respect for canned grape leaves, that's for sure!
Yiouvetsi me Kimá Galopoúlas
Adapted from greekfood.about.com
Ingredients:
- 1 lb of ground Turkey
- 2 tablespoons + 2 tablespoons of olive oil
- 1 medium yellow onion, finely chopped
- 1 1/2 cans of crushed tomatoes
- 1/2 cup of water
- 2 stalks of celery, chopped
- 1 bay leaf
- 1 1/2 cups of orzo pasta
- 4 cups of boiling chicken broth or stock
- sea salt
- freshly ground black pepper
- 1 bunch of fresh parsley, chopped
- Grated salty cheese (optional, we didn't use)
- Preheat the oven to 390°F.
- Over medium heat, brown the turkey in 2 tablespoons of olive oil in a skillet, using a spatula to separate the meat out into small pieces. (should look like minced meat with slightly larger clumps)
- When meat is browned just to the point where it doesn't look red, transfer to a colander and drain.
- Over medium heat, sauté chopped onion in 2 tablespoons of olive oil. When the onion turns translucent, stir in drained turkey, tomatoes, 1/2 cup of water, celery, bay leaf, 1 rounded teaspoon of sea salt, and 1/4 teaspoon of pepper.
- When it reaches a boil, cover and reduce heat to a simmer, cooking for 20 minutes. Taste and add more salt and pepper to your preference.
- In a separate saucepan, bring chicken broth or stock to a boil.
- Remove bay leaf, and transfer the meat mixture to a greased baking or oven-safe casserole dish. Add boiling stock or broth, and stir in the pasta.
- Cook uncovered in the oven preheated oven for about 30-40 minutes, until the pasta is done and almost the liquid has been absorbed. Stir once or twice during cooking.
- Remove pot from the oven and cover with a cotton towel for 10 minutes (to absorb excess moisture).
- Stir in the fresh parsley just before serving.
1:16 PM
Post Was Published On
Swati
Posted in
A Far East Feast!
Hi everyone!! Hope you all had a lovely time celebrating Christmas with your families! I'm lucky enough to have an ongoing celebration since my sister is visiting for a whole week which means more food to be consumed and movies to be watched :) Hooray!
While we're on the subject of food consumption, Today's theme is "Asian Food". I'm going to share two successful Asian dishes I have cooked in the past month and a half. Mind you it may not be 100% authentic, but I can't complain if my taste buds are happy!
Chili Shrimp
Ingredients:
Directions:
Kung Pao Pasta w/Chicken
Adapted from the recipe by SushiBytes
Ingredients:
Ingredients for Sauce:
While we're on the subject of food consumption, Today's theme is "Asian Food". I'm going to share two successful Asian dishes I have cooked in the past month and a half. Mind you it may not be 100% authentic, but I can't complain if my taste buds are happy!
Chili Shrimp
Ingredients:
- 3 tbsp Olive Oil
- 2 Shallots (Chopped)
- 2 Garlic Cloves (Chopped)
- 1 Red Chili (Fresh or Dried)
- 1 lb Tomatoes (Skinned and Chopped)
- 1 tbsp Tomato Paste
- 1 Bay Leaf
- 2-3 Basil Leaves (roughly torn)
- 6 tbsp Dry White Wine
- 1 lb Cooked Jumbo Shrimp (I used frozen, fresh is fine too!)
- Salt and Pepper to taste
Directions:
- Heat oil in a pan on medium heat
- Add shallots, garlic and chili and fry until garlic starts to brown
- Add tomatoes, tomato paste, bay leaf, wine and salt and pepper.
- Bring to a boil and then reduce heat and simmer for 10 minutes, stirring occasionally until sauce has thickened.
- Remove the bay leaf
- Stir the shrimp into the sauce and heat for a few minutes (if shrimp is frozen, cook until the shrimp is completely thawed and hot)
- Serve with Basil on top
Kung Pao Pasta w/Chicken
Adapted from the recipe by SushiBytes
Ingredients:
- 2-3 Boneless Skinless Chicken Breast Cutlets (Cut into bite size cubes)
- 2 1/2 Tbsps Olive oil
- 4 dried red chilis
- 4 garlic cloves, minced
- 1 small green bell pepper, cut into 1-inch rectangles
- 1 1/2 cups broccoli florets
- 1/2 cup unsalted dry roasted peanuts (I didn't add this)
- 2 tsps cornstarch dissolved in 1 tablespoon water
- 2 1/2 cups of cooked spaghetti/fusili pasta
Ingredients for Sauce:
- 1/4 cup balsamic vinegar
- 1/4 cup chicken broth
- 1 Tbsp rice wine vinegar
- 3 Tbsp soy sauce
- 2 tsps chili garlic sauce
- 2 tsps sugar
- 2 tbsp soy sauce
- 1 tsp corn starch
- Combine marinade ingredients in bowl then add chicken. Stir to coat and let stand for 10 minutes.
- Combine sauce ingredients in new bowl then set aside.
- Place wok over high heat until hot. Add 2 tablespoons oil, swirling to coat sides.
- Add chilies and cook while stirring until fragrant, for about 10 seconds.
- Add chicken and stir-fry for 2 minutes.
- Remove chicken and chilies from wok and place in a bowl on the side.
- Add remaining 1/2 tablespoon oil, swirling to coat sides.
- Add garlic and cook while stirring until fragrant, for about 10 seconds.
- Add bell pepper, broccoli and peanuts, then stir-fry for 1 1/2 minutes.
- Return chicken and chilies to wok and stir-fry for 1 minute. Add sauce and bring to boil.
- Add cornstarch solution and cook while stirring until sauce boils and thickens.
- Add cooked spaghetti and toss to coat.
4:13 PM
Post Was Published On
Swati
Posted in
Fall-ing for Fall Foods!
My titles keep getting better and better don't they? I'm a huge cornball, if you haven't already guessed. Soooo I think fall is my most favorite season! I know it's odd because people generally embrace spring due to the promise of warmer temperatures. But I love fall because I'm not a fan of terrible heat and fall introduces a bit of crisp coolness to the awful DC summer heat! In honor of my favorite season, we had a fall-themed dinner a month ago. It was delicious, nutritious and did I mention delicious?? :)
Butternut Squash Soup
Ingredients:
Directions:
Ingredients:
Pumpkin Cookies
Ingredients:
Butternut Squash Soup
Ingredients:
- 1 medium Butternut Squash
- 1/2 medium white onion - diced
- 3/4 cup non-fat yogurt
- 4 cups chicken stock or water with bouillon cubes to taste
- 1/2 tsp ground black pepper
- 1/2 tsp of ground sage
- 1 tsp of salt (to taste)
Directions:
- Peel, remove the seeds and cut the squash in cubes.
- In a large 2 quart sauce pan with 1 tbsp of olive oil, sautee the onion on medium-high heat until translucent.
- Add the squash and the chicken stock/water with bouillon cubes and bring to boil.
- Reduce heat to simmer, cover and cook for 15-20 minutes or until squash is tender.
- Cool the mixture for 10-15 minutes and puree in blender.
- Add the pureed squash and onion back to the sauce pan and heat on medium.
- Add the yogurt, salt, sage and whisk well until completely mixed.
- Heat for 5 minutes before serving!
Roasted Fall Vegetable Medley
Ingredients:
- 1 cup of 1 inch cubes of butternut squash
- 1 1/2 cups of carrots julienned (thick slices not thin)
- 4-5 white baby potatoes cut into 1 inch cubes
- 1/2 red bell pepper julienned (thick slices not thin)
- 1 medium sweet potato cut into 1 inch cubes
- 1/2 cup onion cut into thick slices
- 5-6 brussel sprouts cut in half
- 2 tsp sea salt
- 2 tsp black pepper
- 2 tsp sage
- 3 tbsp olive oil
- Preheat overn to 450 degrees.
- In a large mixing bowl, place all the cut vegetables and pour the olive oil, sea salt and sage.
- Toss the vegetables and ensure they are coated with olive oil and seasoned well.
- On a lightly greased foil sheet on a baking pan, place the vegetables and spread them out evenly and as much as possible ensure they are all touching the foil.
- Place the baking pan in the oven for about 30-40 minutes, tossing the vegetables halfway through.
- Serve while hot!
Pumpkin Cookies
Ingredients:
- 1/2 cup butter or margarine, softened
- 1 cup granulated sugar
- 2 eggs
- 1 can (15 ounces) pumpkin (not pumpkin pie mix)
- 2 1/2 cups all-purpose flour
- 2 1/2 teaspoons baking powder
- 1 teaspoon baking soda
- 1 teaspoon salt
- 1 teaspoon ground cinnamon
- 1/4 teaspoon ground allspice
- 1/4 teaspoon ground nutmeg
- 1/4 cup chopped hazelnuts
- Heat oven to 375º.
- Grease cookie sheet. Mix butter and sugars in large bowl with spoon.
- Beat in eggs.
- Stir in pumpkin.
- Stir in remaining ingredients.
- Drop dough by tablespoonfuls about 2 inches apart onto cookie sheet.
- Sprinkle some chopped hazelnut on each cookie
- Bake 10 to 12 minutes or until set and golden. Cool 1 to 2 minutes; remove from cookie sheet to wire rack.
4:48 PM
Post Was Published On
Swati
Posted in
Theme Galore! (aaaaaand back in action I hope!)
Dear readers,
If you're seeing this, I applaud your loyalty to my humble and neglected blog. I have been consumed entirely by work and my post-work fatigue. But that is a pretty lame excuse, and who ISN'T tired after work? Really Swati, try again! But I am back here, hoping that this won't be another crying wolf situation and slowly get this blog back on its feet again! The great news though, despite my lack of visible updates, is that I have still been cooking up a storm! My energy level has purely failed in the visible updating/blogging department. Thanks to my boyfriend who has also been participating in the cooking process, we have been doing theme weeks! I will start with recipes from our "Bowl Themed Dinner" where all our foods were in edible bowls! Warning this is quite long, but only cause we made three things :)
Open Faced Samosa
Ingredients:
Quinoa Stuffed Bell Peppers
Ingredients:
If you're seeing this, I applaud your loyalty to my humble and neglected blog. I have been consumed entirely by work and my post-work fatigue. But that is a pretty lame excuse, and who ISN'T tired after work? Really Swati, try again! But I am back here, hoping that this won't be another crying wolf situation and slowly get this blog back on its feet again! The great news though, despite my lack of visible updates, is that I have still been cooking up a storm! My energy level has purely failed in the visible updating/blogging department. Thanks to my boyfriend who has also been participating in the cooking process, we have been doing theme weeks! I will start with recipes from our "Bowl Themed Dinner" where all our foods were in edible bowls! Warning this is quite long, but only cause we made three things :)
Open Faced Samosa
Ingredients:
- 1 can of Pillsbury Crescent Roll dough
- 2-3 medium red potatoes- diced
- 1 small onion- diced
- 1/2 cup of frozen peas
- 2 tsp of garam masala (or curry powder)
- 2 tsp of salt
- 1 tsp of cumin powder
- 1 tsp of chili powder
- 1 tsp of turmeric powder
- Heat a tablespoon of oil in a skillet/shallow pan and heat oven to 375 degrees.
- Add the onion and cook until translucent.
- Add the potatoes, peas and all the seasonings & salt to the onion.
- Mix well and add 1/4 cup of water and cover with the heat on medium-high for about 4-5 minutes, or until potatoes are tender.
- While the filling is cooking, prepare the shells by unrolling the dough from the can. While the dough comes with 8 perforated triangles, we want 4 rectangles. Just press the perforations between two triangles and separate from the rest to create a rectangle.
- Use the backside of a medium sized non-stick muffin pan (turn the pan over so you're using the protrusions not the craters), place a rectangle of the dough on one of the corner protrusions and shape it gently around the protrusion so it forms the same shape (an upside-down bowl essentially).
- Repeat this with the other 3 rectangles and use the corner protrusions so they have room to expand without sticking to each other in the oven.
- Place the pan (still upside-down) in the oven for 12-15 minutes.
- Remove the dough bowls from the pan gently and place about 2-3 tablespoons of the potato filling in each.
- Serve while warm! (Also, while this concept may seem odd, you basically eat it like a savory tart ;-))
Quinoa Stuffed Bell Peppers
Ingredients:
- 2 Red Bell Peppers with the tops cut off (we used green, but I think red would be better if you can get your hands on em!)
- 1 medium onion- finely chopped
- 1 tbsp ground cumin
- 2 cloves garlic- minced
- 1 large tomato- diced and drained
- 1 (15 oz.) can black beans, rinsed and drained
- 3/4 cup quinoa
- 1 3/4 cup of water
- 1 1/2 cups shredded cheese (we used a four cheese blend)
- Salt and pepper to taste
- Preheat oven to 350 degrees.
- Heat a tablespoon of oil in a saucepan over medium heat.
- Cooking the onion until translucent.
- Add the garlic and cook for 2-3 minutes.
- Add the tomato and cook until liquid has evaporated, about 5 minutes or so.
- Add the quinoa, the 1 3/4 cup of water, salt and pepper and bring to a boil.
- Reduce heat to medium low and simmer, covered, for 15 minutes or until quinoa is tender.
- Add 1 cup of the cheese and the black beans to the quinoa, mix well and remove from heat.
- Fill each bell pepper to the top with the quinoa mixture and place them in a baking dish covered with foil.
- Bake for 40 minutes.
- After removing the baking dish from the oven, sprinkle the additional cheese on the top and serve warm!
Chocolate Chip Cookie Cup w/Vanilla Bean Ice Cream
Ingredients:
- 1 package of CHEWY break n' bake cookies
- 1 pint of Vanilla Bean ice cream
Directions:
- Follow the directions on the back of the break n' bake cookies for baking temperature and timing. This varies with each brand.
- Similar to the samosa, you will be using the back of a medium sized muffin pan.
- Lightly grease the muffin protrusions depending on the number of cookie bowl/cups you wish to bake (we just made two).
- Take about 2-3 cookies worth of dough for each bowl, roll them together in your hand and flatten to the size of your palm.
- Take the flattened dough, place it on one of the muffin pan protrusions and shape the dough around the protrusion to form the shape of the cup.
- Once you've completed forming all the cups, place the pan in the same upside down manner in the oven for the time stated on the cookie package.
- After the cookies have baked to the time (or are golden brown), remove the pan and let it cool out for about 6-10 minutes.
- Gently remove each cookie cup/bowl, they can be extremely fragile.
- Place a scoop of the vanilla bean ice cream in the cookie cup and serve!
11:30 PM
Post Was Published On
Swati
ssssssssss.....Saucy!
The more I cook the more I realize how hard it is to keep buying fresh ingredients and using ALL of it up for my dishes. More often than not I always have leftovers, like half an onion or an odd tomato or two etc. Perhaps it's because of the household I grew up in, but I feel extremely guilty when I have to throw out unused produce that sat in the fridge too long. So I'm trying as much as possible to use what I have in the fridge and buy the rest as needed. I had tomatoes, half a rather gigantic red onion, frozen chicken tenderloins and leftover white wine . So I googled and found some pretty tasty recipes and decided to try two (1 | 2) in particular that caught my eye. Of course I changed the recipe to accommodate ingredients I didn't have or wanted to add. With a few additional purchases and the help of my bf, we whipped up a pretty delicious meal. *The wine sauce fell a bit short for the pasta (which I later corrected by making another portion of sauce and adding it to the leftover pasta dish). I adjusted the recipe accordingly for today's post!
Veggie Pasta in White Wine Mushroom Sauce
Ingredients:
Directions:
Chicken in Balsamic, Red Onion and Tomato Sauce
Ingredients:
Directions:
Veggie Pasta in White Wine Mushroom Sauce
Ingredients:
- 1/2 a box of thin spaghetti pasta (1/2 of a 1 lb. box)
- 2 medium tomatoes- diced
- 1 can of artichokes- diced large
- 1 12/ cups of sliced mushrooms
- 1 tbsp of chopped fresh basil
- 1 tsp of dried oregano
- 6 cloves of garlic- minced
- 3/4 cup of dry white wine (do not use sweet wines)
- 3/4 cup of vegetable or chicken broth
- 1 tbsp of tomato paste
- 1 tbsp flour for thickening (mixed with 1/8 cup of the broth to remove clumps)
- 2 tbsp olive oil
- 1 tbsp of balsamic vinegar
- Black and crushed red pepper to taste
- 1 tbsp of salt (adjust to taste)
Directions:
- In a large pot, boil water with a few spoons of salt and cook the spaghetti as directed on the box. We cooked until the pasta was tender (not al dente). Drain water and save the spaghetti.
- In a large skillet on medium heat, heat olive oil and sautee the minced garlic until they brown slightly.
- Add the mushrooms, artichokes, basil, oregano, black and crushed red pepper and stir until mushrooms have softened a little for about 5 minutes.
- Add the dry white wine and simmer for 5 minutes until the wine has reduced/evaporated a bit.
- Add the broth, flour, tomato paste, tomatoes and salt, and simmer for another 3 minutes.
- Remove from heat and add the sauce and a splash of balsamic vinegar to the pasta, mix well and serve.
Chicken in Balsamic, Red Onion and Tomato Sauce
Ingredients:
- 6-8 chicken tenderloins (thawed if frozen)
- 1/2 cup of balsamic vinegar (save 3 tbsp for sauce)
- 2 cups of red onion sliced
- 1 cup of diced tomatoes
- 1 tbsp tomato paste
- 1 tbsp brown sugar
- 1/2 cup of chicken broth
- 1-2 tbsp of olive oil
Directions:
- This isn't necessary but if like me you want more flavor infused into chicken, marinate the chicken in a ziploc bag with 1/2 cup of balsamic vinegar, some salt and pepper overnight.
- In a skillet on medium heat, heat oil and cook the chicken through until juices run clear (save the marinade in the ziploc for later).
- Place the chicken in a plate/bowl and in the same skillet, add the onions and cook for 7-8 minutes or until onions have caramelized.
- Add the tomatoes and sautee for 2-3 minutes.
- Add 3 tbsp of the marinade, tomato paste, chicken broth and brown sugar and stir well so no clumps remain.
- Add salt and pepper as preferred, mix well and turn off heat.
- Add the chicken to the sauce and serve after 10 minutes.
6:56 PM
Post Was Published On
Swati
Posted in
Sweet Surprise!
So this is a bit embarrassing to admit but, I had never in my life tried Nutella before last week. I know, it's pretty crazy... but for some reason I assumed it was some disgusting mish mosh of chocolate and peanut butter and jelly? Yeah... don't ask. I make things up in my head all the time. I recently decided to make something for dessert that was easy to transport (for a get together) and scoured through many recipes, per usual. I came across one in particular that looked delicious and all the ingredients in it sounded drool-worthy. While shopping for ingredients, I noticed one of the listed items was a jar of "Hazelnut & Cocoa spread" and when I came across it in the grocery store isle, to my shock it was a jar of Nutella! I realized that I had spent MANY years under the wrong assumption. Of course at that point I realized that I was about to embark upon a great (and well known by many) epiphany:- Nutella is a mindblowing delicious concoction! Sigh... if only I had not wasted so many precious years under my crazy assumption. Anyway, I'm SO glad I tried this recipe out and I'm sure anyone who tries this will enjoy it just as much as I did-
Chocolate-Hazelnut Turnovers
Ingredients:-
Directions:-
Chocolate-Hazelnut Turnovers
Ingredients:-
- 1 can (8 oz) Pillsbury® Crescent Roll dough
- 1/4 cup Nutella
- 1/2 tablespoon chopped hazelnuts
- 1/2 pear chopped into small pieces (I used a Bosc pear)
- 1 teaspoon unsweetened cocoa powder
- 1 teaspoon powdered sugar
Directions:-
- Heat oven to 375°F.
- Unroll dough; separate into 4 rectangles. Press perforations together to seal the dough together.
- In a bowl mix the chopped hazelnuts and chopped pear.
- Spoon about 1/2 tablespoon Nutella onto center of each square; spread to within 1/2 inch of edges.
- Spoon 1/8 pear mixture over hazelnut spread on each square.
- Fold corners over filling, forming triangles; press edges with fork to seal. Place on ungreased cookie sheet. Prick tops of each with fork.
- Place in oven for about 12-15 minutes (until golden brown) and let cool for 5 minutes after it is taken out of the oven.
- Using a sieve or strainer, gently dust cocoa powder over the turnovers. Using another strainer or after cleaning the same strainer, gently dust with powdered sugar.
- Serve either warm or at room temperature!
5:42 PM
Post Was Published On
Swati
Fast Life = Fast Food Creations
My deepest apologies for the unexpected 2 month hiatus! Between weekend travels and a new job (that involves longer hours and commute), I didn't get a chance to cook a whole lot of new and interesting things. But with life settling down a bit more, I do anticipate new culinary creations :) To get a head start on making up for the lack of posts, I bring you 2 new dishes (that I cook quite often)! They involve the same ingredients, but cooked in different forms and both make for great one pot meals.
Ingredients:-
Ginger Vegetable & Tofu Scramble
Hot & Sour Clear Broth Soup
Ingredients:-
- 7 oz. of Extra Firm Tofu, drained and cut into 1/2 inch cubes
- 1 1/2 Cups of Snow Peas
- 1 Cup of Sliced Mushrooms
- 2 Medium Eggs
- 2 (32 fl. oz.) Cartons of Organic Low-Sodium Chicken/Vegetable Broth * I use Trader Joe's
- 3 Tbsp of Distilled White Vinegar
- 2 Tbsp of Rice Wine Vinegar
- 4 Tbsp of Soy Sauce
- 3 Tbsp of Corn Starch
- 3 Tbsp of Chilli Garlic Sauce
- Combine 3 tablespoons cornstarch with 3 tablespoons water in small bowl and mix thoroughly; set aside, leaving spoon in bowl. Mix remaining 1/2 teaspoon cornstarch with remaining 1 teaspoon water in small bowl; add eggs and beat with fork until combined. Set aside.
- Bring broth to boil in large saucepan set over medium-high heat. Add snow peas and cook for 4 minutes in boiling broth.
- Reduce heat to medium-low. Add mushrooms and simmer until mushrooms are just tender, about 5 minutes. Add tofu and continue to simmer for 2 minutes.
- Stir cornstarch mixture. Add to soup and increase heat to medium-high; cook, stirring occasionally, until soup thickens and turns translucent, about 1 minute. Stir in vinegar, chili garlic sauce, and soy sauce; turn off heat.
- Without stirring soup, use soupspoon to slowly drizzle very thin streams of egg mixture into pot in circular motion. Let soup sit 1 minute, then return saucepan to medium-high heat. Bring soup to gentle boil, then immediately remove from heat.
Ginger Vegetable & Tofu Scramble
Adapted from the recipe by Sweetest Kitchen
Ingredients:-
- 3 Tbsp Vegetable Oil
- 2 Cups of Fresh Snow Peas
- 350g Extra Firm Tofu, cubed
- 1/2 cup of Sliced Mushrooms
- 3 Large Eggs
- 1 Tbsp Crushed Red Pepper
- 1 Tsp Fresh Ginger, peeled and grated
- 2 cloves garlic, minced
- 3 Tbsp Soy Sauce
- 2 Tbsp Chilli Garlic Sauce
- Heat vegetable oil in a frying pan over medium-high heat. Add cubed tofu and lightly brown. Remove tofu from pan and set aside.
- Add a little oil/butter to the same pan and cook the eggs (scrambled) with salt and pepper and set aside.
- Heat remaining 2 tablespoons vegetable oil in same frying pan. Cook red pepper, ginger and garlic until fragrant. Add snow peas and mushrooms, and stir to evenly coat with spices. Cook for about 3 minutes.
- Return tofu and scrambled eggs to pan. Pour soy sauce and chilli garlic sauce over the snow peas, eggs and tofu in the pan and stir to evently coat.
11:19 PM
Post Was Published On
Swati
Posted in
Easy Black Bean & Rice Enchiladas
So this dish is probably a no-brainer to most of you, but I'm a wee bit behind on the home-made Mexican/Tex-Mex food game :) I don't know why that is, perhaps it's because our family generally gravitates towards Asian cuisines when we cook at home. But we are huge fans of ALL cuisines when we go out to eat. I'm slowly trying my hand at new cuisines when I cook at home. I figured, what better place to start than Mexican. Most Mexican/Tex-Mex dishes are very easy to make and extremely delicious (my favorite combo:- easy + delicious).
The enchilada sauce recipe is an adaptation of Emeril Lagasse's recipe and the rest was something I whipped up from memory. Needless to say it turned out to be awesome and my taste-tester could attest to this :)
Easy Black Bean & Rice Enchiladas [Serves 2-3]
Sauce Ingredients:-
Enchilada Ingredients:-
Sauce Instructions:-
I know this seems extensive, but trust me this takes approximately 45 minutes to prep and make if you have all the ingredients on hand! If you're a novice with Mexican food, I urge you to try this out! It was truly divine :)
The enchilada sauce recipe is an adaptation of Emeril Lagasse's recipe and the rest was something I whipped up from memory. Needless to say it turned out to be awesome and my taste-tester could attest to this :)
Easy Black Bean & Rice Enchiladas [Serves 2-3]
Sauce Ingredients:-
- 3 Tbsp Vegetable Oil
- 1 Can of Tomato Paste (6 Oz.)
- 2 Cups of Chicken or Vegetable Stock
- 1 Tbsp All-Purpose Flour
- 1/8 Cup Chili Powder
- 1 Tsp Salt
- 2 Tsp Oregano
- 2 Tsp Cumin Powder
Enchilada Ingredients:-
- 6 Medium Multigrain Tortillas
- 1 Cup of White Rice (or brown if you prefer)
- 1 Can of Black Beans (drained)
- 1 Medium Onion (diced)
- 1/2 Bell Pepper (diced)
- 1/4 Cup of Chopped Cilantro
- 1 1/2 Cups of Shredded, Mexican Blend Cheese
- 2 Tbsp of Vegetable Oil
- 1 Tbsp of Butter
- 2 Tbsp Lemon/Lime Juice
- 1 Tsp Turmeric Powder
- 2 Tbsp Chilli Powder
- 2 Tbsp Salt
- 2 Cups of Water (for the rice)
Sauce Instructions:-
- In a medium saucepan with the heat on medium-high, heat the vegetable oil and add the flour, blend and cook for a minute.
- Add the chilli powder and cook for 30 seconds.
- Add the chicken/vegetable stock, tomato paste, oregano, cumin powder and salt and blend well (make sure there are no clumps).
- Bring mixture to a boil, reduce heat to simmer for another 15 minutes before turning the heat off.
- In a non-stick sauce pan, add the cup of uncooked rice, butter, 1 tbsp salt, tbsp of chili powder, chopped cilantro, turmeric powder, lemon/lime juice, 2 cups of water.
- Bring to a boil on high heat and reduce heat to simmer. Cover the pan and cook for 12 minutes or until rice is cooked and water has evaporated.
- In a non-stick skillet on medium heat, add vegetable oil and sautee the diced onions until translucent.
- Add the dice bell pepper and cook for about 2 minutes.
- Add the drained black beans and a tbsp of chilli powder, 1 tbsp of salt. Cook for 2-3 minutes and turn heat off.
- Mix rice and the black bean mixture together in the sauce pan.
- On a plate, place one multigrain tortilla. Add about 5-6 tablespoons of the rice & black bean mixture near the bottom of the tortilla.
- Fold the bottom of the tortilla and roll over the mixture, continue rolling until a cylinder forms and tuck into seam. Place the roll, seam-down, into a 13x9 greased baking pan. Repeat this until all 6 tortillas have been rolled, filled and placed next to the other tortilla rolls. *note:- you can also just assemble the tortilla within the baking pan if it is easier!
- After the rolls have been placed, pour the sauce until all the tortillas are evenly covered.
- Finally, sprinkle the shredded cheese evenly on top and place the baking pan in the oven for 12-15 minutes.
I know this seems extensive, but trust me this takes approximately 45 minutes to prep and make if you have all the ingredients on hand! If you're a novice with Mexican food, I urge you to try this out! It was truly divine :)
3:24 PM
Post Was Published On
Swati
Posted in
Fish Curry... in a Hurry!
One of many things I love about our Konkani culture is our love for fish! It is one of the fastest proteins to cook and one of the most delicious because of how well it absorbs marinades and curries into the meat. If you notice, half of my flickr cooking album is filled with fish dishes for that reason. I have experimented with quite a few different recipes and methods of cooking fish:- baking, steaming and deep frying. Since I had never made a fish curry before, I thought I would give it a shot.
There are a variety of amazing Konkani fish curry and fry recipes that I have been fortunate enough to have grown up eating. A majority of the curries involve a base of grated coconut and red chili peppers. However, having grated coconut on hand is not easy in this country unless you are fortunate enough to live close to an Indian, ethnic or organic store like Whole Foods. Since I was limited on resources and I had fish thawing in my fridge, I decided to follow my mother's advice and cook the fish Konkani style, but with a recipe that deviates entirely from using grated coconut. The result was surprisingly easy and delicious:-
Onion Fish Curry
Ingredients:-
Instructions:-
This is the same recipe I have used in the past for a Konkani dish called "Batata Song" which is the same foundation, except instead of fish we add boiled and cubed potatoes. This dish tastes better the longer you store it in the fridge after cooking, giving the fish more time to absorb the flavors of the curry/base. All in all this recipe took me about 25 minutes to make. So if you're in a rush and want to serve up something easy yet exotic and delicious, I highly recommend this dish!
There are a variety of amazing Konkani fish curry and fry recipes that I have been fortunate enough to have grown up eating. A majority of the curries involve a base of grated coconut and red chili peppers. However, having grated coconut on hand is not easy in this country unless you are fortunate enough to live close to an Indian, ethnic or organic store like Whole Foods. Since I was limited on resources and I had fish thawing in my fridge, I decided to follow my mother's advice and cook the fish Konkani style, but with a recipe that deviates entirely from using grated coconut. The result was surprisingly easy and delicious:-
Onion Fish Curry
Ingredients:-
- 4 Fillets of any sort of "Flatfish" (I used Flounder, you can also use Tilapia or Halibut etc.)
- 2 Medium Onions - diced
- 3 Tsp Red Chilli Powder (you can also use dried red chillies)
- 1 1/2 Tbsp of Tamarind Paste or Freshly Soaked Tamarind
- 2 1/2 Tbsp of Tomato Paste
- 3-4 Cups of Water (change amount depending on how thick you want the sauce/curry)
- 1 Tbsp Salt (Please add little to start and adjust to taste)
Instructions:-
- In a large skillet on medium heat, heat a tablespoon of vegetable oil and sautee diced onions until they are translucent
- Add the red chill powder next and mix with onions for about a minute. If you are using dried whole red chillies, make sure you sautee them separately until they are dark in color and then add to the sauteed onions.
- Add the 3-4 cups of water, tamarind paste/concoction and tomato paste to the sauteed onions and mix well untill all of the pastes have dissolved and the curry begins to bubble.
- Add salt as needed. Be sure to start with a little and increase the amount of salt if the curry/base is too sour. Make sure all the ingredients have mixed well.
- Add the fish fillets and be sure to place them in the skillet side to side (not on top of each other) and cook the fish for about 6-8 minutes and turn off the heat once the fish is opaque and flakes. Also a very important thing to note here is: Once you add the fillets you cannot use any utensils to mix the fish into the curry, because fish is very delicate and will break into the curry which is not desirable. Use the handle(s) of the skillet and move it in circles, swirling the curry into the fish gently.
- Let stand for 5-10 minutes before serving with rice or your choice of grain.
This is the same recipe I have used in the past for a Konkani dish called "Batata Song" which is the same foundation, except instead of fish we add boiled and cubed potatoes. This dish tastes better the longer you store it in the fridge after cooking, giving the fish more time to absorb the flavors of the curry/base. All in all this recipe took me about 25 minutes to make. So if you're in a rush and want to serve up something easy yet exotic and delicious, I highly recommend this dish!
8:32 PM
Post Was Published On
Swati
Posted in
Powered by Blogger.
No Comments Yet
Add your comment